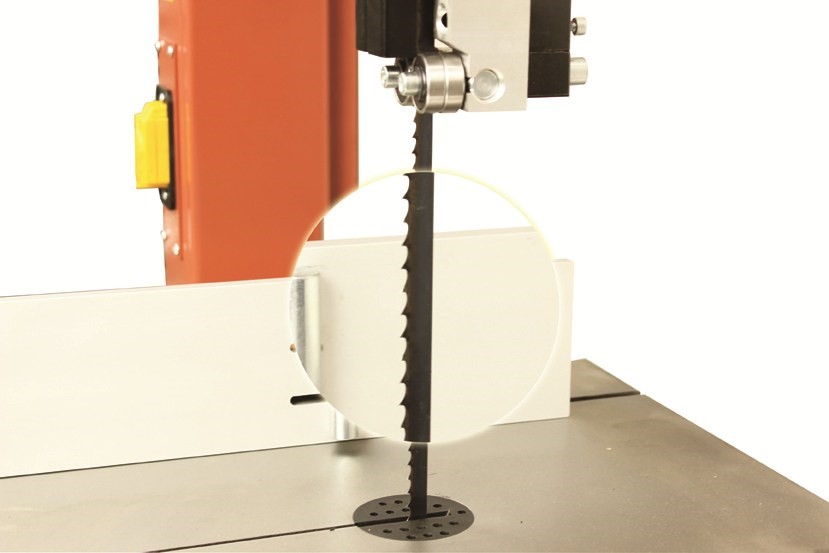
When you look at the whiz-bang models on offer today, it’s hard to believe that the first bandsaw was invented over 210 years ago. The best part? The idea was quickly abandoned, because due to the flexing of the blade, it would cause the joint material to fall.
But if you strip a modern bandsaw back to basics, you can see why the original pully-system design eventually worked. Sure, there’s a four-pole motor and hundreds of watts of power, but at its base a simple design – like all great tools – has stood the test of time.
Have we lost the art of simple woodworking, now that the simple bandsaw has a swathe of features that can rival the first computers?

Ease of operation and cleverness of design have revolutionised modern woodworking, but the newer a bandsaw is the more complicated it becomes, which is why it’s worth taking a look at some of the mistakes people make with bandsaws today.
They’re not quite as simple as they were two centuries ago…
The most common mistake bandsaw owners make is selecting the wrong blades, specifically, they attempt to use blades that are far too fine.
The low-down on blades
- If you’re working on anything less than 19mm you want to work on a 6 TPI blade.
- Anything less than 10mm requires a 10 TPI blade.
- Anything greater than that, 3-4 TPI unless you’re doing a deep rip (1 ¼ TPI).
 Bandsaw operators tend to want a 3 - 4 TPI blade, but 75% of owners should be buying blades between 9 - 18. The other blades should be a small part of the market, but people choose blades that are far too fine and then complain about the machines not cutting properly.
Most of the time they’re trying to get a smooth finish on a thick bit of material so they go with a 10 TPI blade. It’s an understandable reaction, but all that happens is the blade clogs up because of the sawdust.
There’s simply not enough space for the waste, so it starts burning and furring because there’s so much material that’s within the cut as you push the saw.
Meanwhile, the actual cut is getting clogged up while you’re trying to ram a blade through. There’s nowhere for the material to go, so it just goes everywhere, which is when you start getting problems with quality. 90% of cutting performance problems are down to the blade and not the machine.
At the hobbyist end of the market bandsaws can be very similar. In fact, with some expensive American brands you’re simply buying the branding on the front. When you’re looking for a bandsaw, look at the warranty that’s offered. Sherwood is one of the only brands in Australia that offers a 5-year warranty for good reason.
Timbecon has been partnered with Sherwood for around 27 years now, enabling us to spec these machines the way we want to spec them. We have the blade guides developed for them and the SKF bearings put into them. Anything we see as a weak point, we get upgraded.
So the biggest thing isn’t necessarily what’s under the hood. Look first at the warranty, then at getting the blade selection right. But the mistakes don’t end here: check out part two to find out where else you could be going wrong…
The next most common mistake is a little more esoteric – it isn’t actually related to the bandsaw itself, it’s that pesky add-on: dust extraction...
The low-down on dust
Some operators (clearly with lungs of steel) aren’t aware that bandsaws require a method of dust extraction, but believe us, the more the better. Removing dust from the blade is as much a performance issue as it is for safety; if you don’t pump the sawdust away from the workpiece it quickly becomes clogged on the blades, the wheels and the guide assemblies. The dust then cakes on to your machine and you begin to have serious operational problems.
 If this sounds like your machine, don’t worry. Dust extraction isn’t just a problem for bandsaw operators, it’s a necessary evil for virtually every aspect of woodworking. For too long people have believed it’s just their airways, hair and woollen cardigans that cop the brunt, but their machines can be just as fragile.
- There are two types of dust extraction, single and twin stage.
- Motor size, the quality of your propeller and the amount of airflow are the most important factors in purchasing an extractor.
- It’s also worth looking into whether you can add a canister filter onto the extraction system, although if you do, don’t forget you have to clean it!
If you’re creating a small amount of dust then you can buy a cheap extractor. It’s large projects and transporting dust long distances that require the more expensive models. Sure, you can get away with a cheaper system for a while, but like everything in woodworking it won’t provide exactly what you need it to and will inevitably run out of capacity before you do.
We find a lot of customers buy a cheap extraction system and soon return for a more expensive model because it can’t handle the capacity they require from it.
If you are currently looking scornfully at the under spec’d extractor sitting in the corner of your workshop, dreading the trip back to buy an expensive model, just to see yours go to waste, at least in most cases you have the option to buy a second smaller model instead, and simply run both.
So now you’re looking around your workshop / garage / storage closet / kid’s rumpus room thinking how can I possibly accommodate a dust extraction system.
Well, this is the final thought we’ll leave you with (we’re not letting ourselves out of this mea culpa either). Woodworkers can tend to be a tad over-ambitious.
If you’re tossing up between a bandsaw and table saw, think about the amount of space you have and whether a bandsaw – which takes up a fraction of the space – can do the job.
One of the best things about a smaller bandsaw is they’re mobile, allowing you to move them out of the way as projects demand your attention, then re-emerge them like the loyal tools they are when they’re required.
If you choose a solid included warranty over an ‘optional extended’ one and don’t fall prey to dust extraction and blade-size issues, you’ll have a lifetime of servitude and many happy woodworking years ahead.

